In summary:
- Ditch abrasive toothpaste for clear antibacterial soap or specialized foams to protect aligner clarity and prevent bacterial growth.
- Practice “hygiene triage” during your workday: swish with water, use a portable water flosser, or do a quick brush when a full clean isn’t possible.
- Master discreet removal in public settings like Montreal restaurants by excusing yourself before food arrives and using a slim, stylish case.
- Stay hydrated and use tools like tongue scrapers and xylitol gum to combat dry mouth and bad breath, which aligners can exacerbate.
- Always travel prepared with your previous, current, and next set of aligners to handle any loss or damage without derailing your treatment.
It’s 3 PM on a long workday in downtown Montreal. You’ve been in back-to-back meetings since your morning coffee, and a familiar, unwelcome feeling creeps in: your clear aligners feel… less than fresh. That nagging anxiety about potential odor or visible buildup is a common struggle for dedicated aligner users, especially those juggling long hours, commutes, and a busy social life. The standard advice to “brush after every meal” sounds simple, but it’s a logistical fantasy when you’re navigating the realities of a professional schedule. You can’t just set up a full dental station in the office washroom.
This guide is for you. We’re going to move beyond the generic tips and into the realm of practical, on-the-go hygiene hacking. The secret to all-day freshness isn’t about achieving a perfect, sterile clean every few hours. It’s about a smarter strategy: proactive biofilm disruption. Biofilm is the sticky, invisible layer of bacteria that causes odor and plaque. By consistently interrupting its formation throughout the day—even with small actions—you prevent it from maturing into a noticeable problem. This approach, which we’ll call “hygiene triage,” prioritizes what you *can* do, right now, to maintain your oral health and confidence.
Forget the guilt of not being able to do a full clean. Instead, we’ll explore the science behind why some common habits (like using toothpaste) are counterproductive, how to manage your aligners discreetly during a dinner date in Old Montreal, and what to do in real-world emergencies, like losing a tray on a weekend trip to the Laurentians. It’s time to build a realistic, effective routine that fits your demanding lifestyle.
This comprehensive guide will walk you through the essential strategies and insider tips to maintain pristine aligners and fresh breath, no matter how long your day gets. From the science of clean to practical, Montreal-specific solutions, you’ll find everything you need to know below.
Summary: The Hygiene Hacker’s Guide to Flawless Aligner Maintenance
- Why Toothpaste Is Actually Ruining the Clarity of Your Aligners?
- Dining Out With Aligners: How to Handle Removal Discreetly on a Date?
- What Happens If You Wear Your Trays Only 18 Hours Instead of 22?
- What to Do If You Lose Your Current Tray While on Vacation?
- Why Is the First Day of a New Tray Always the Most Painful?
- Why Is Your Breath Bad Even Though You Brush Twice a Day?
- Why Does Plaque Come Back 12 Hours After a Cleaning?
- Why Toothpaste Is Actually Ruining the Clarity of Your Aligners?
Why Toothpaste Is Actually Ruining the Clarity of Your Aligners?
The first rule of aligner hygiene hacking is a counter-intuitive one: step away from the toothpaste. While it seems logical to clean your trays with the same product you use for your teeth, it’s one of the fastest ways to damage them. The issue lies in the fundamental difference between tooth enamel and the medical-grade polymer of your aligners. Your aligners are strong, but they are not as hard as your teeth.
The problem is abrasion. As dental professionals warn, most toothpastes contain abrasive particles like hydrated silica, designed to scrub stains from tooth enamel. On the softer plastic of your aligners, these particles create thousands of microscopic scratches. While invisible at first, this damage accumulates. These micro-scratches dull the tray’s clarity, making them more noticeable. More importantly, they create a rough surface that becomes a perfect breeding ground for bacteria and plaque, which leads directly to the odors and yellowing you’re trying to prevent. It’s a vicious cycle: the more you “clean” with toothpaste, the dirtier your aligners can become.
So, what’s the alternative? The key is to use a non-abrasive cleaner. Here are some effective, Montreal-accessible options:
- Clear, Unscented Antibacterial Soap: A simple and cheap option. A small drop on a soft-bristle toothbrush (used only for your aligners) works perfectly. You can find this at any Jean Coutu or Pharmaprix.
- Specialized Foams: Products like Polident Pro Guard & Retainer foam are designed specifically for orthodontic appliances and are highly effective.
- Spectro Gel Cleanser: Typically for sensitive skin, this gentle, soap-free cleanser is an excellent off-label choice for cleaning aligners without causing damage.
- Vinegar Soaks: For stubborn mineral deposits from hard water, a weekly soak in a 50/50 solution of white vinegar and distilled water can restore clarity.
Always remember to rinse with lukewarm water only. Hot water can warp the plastic, compromising the precise fit needed to move your teeth effectively. This simple switch in your cleaning routine is fundamental to maintaining both the invisibility and hygiene of your aligners.
Dining Out With Aligners: How to Handle Removal Discreetly on a Date?
One of the biggest sources of social anxiety for aligner wearers is the public removal and reinsertion process, especially in an intimate setting like a date or a business dinner. Fumbling with your trays at a table in a trendy Plateau Mont-Royal bistro is hardly a smooth move. The key to handling this situation with grace is discreet logistics and preparation.
The best strategy is to avoid the table-side removal altogether. Before you’re even seated or as soon as you’ve ordered, excuse yourself to the restroom. This gives you a private, clean space to remove your aligners and place them in their case. When you return to the table, you’re ready to eat and drink without any awkwardness. This simple preemptive move is socially seamless and is common practice in busy Montreal restaurants, from Old Montreal to Griffintown.
Your aligner case is your most important accessory here. Ditch the bulky, brightly-colored case that came with your kit. Invest in a slim, discreet case that looks more like a sleek tech accessory—such as a case for wireless earbuds—or a small pillbox. A metallic or matte black case draws far less attention on a restaurant table than a clinical-looking one.

As the image suggests, the goal is for your hygiene tools to blend into the environment. After the meal, you can simply repeat the process: excuse yourself to the restroom to quickly brush or at least rinse your mouth thoroughly with water before reinserting your aligners. Having a pre-prepared travel kit with a mini-toothbrush, toothpaste, and your case makes this quick and efficient. Mastering these small logistical steps removes the social stress and lets you focus on your company, not your orthodontics.
What Happens If You Wear Your Trays Only 18 Hours Instead of 22?
The “22 hours a day” rule isn’t an arbitrary target; it’s the cornerstone of successful clear aligner therapy. Each tray is engineered to apply a gentle, continuous force to move your teeth into a new, precise position. Consistent wear time is what allows your teeth and the surrounding periodontal ligaments to adapt to this pressure and for the movement to “set.” Falling short of this target, even by a few hours each day, can have significant consequences.
Think of it like a paused movie. When you wear your aligners for only 18 hours, you’re giving your teeth 6 hours to “relapse” or shift back toward their previous position. This stop-and-start movement is not only inefficient, but it can also be more uncomfortable. You’re essentially re-starting the initial pressure phase every single day. Over time, this inconsistent wear means your teeth will not “track” correctly with the programmed movements of the aligner series. The result? Your current aligner will start to feel tight or may not fit properly at all, especially when it’s time to switch to the next one.
Insufficient wear time can cause teeth to no longer fit the prescribed aligner shape, necessitating costly mid-course corrections.
– Canadian orthodontic specialists, Clear aligner therapy practices study
As experts highlight, this tracking failure is a major issue. If your teeth fall too far behind the planned movement, your orthodontist may need to perform a “mid-course correction.” This involves taking new impressions or scans and ordering a new series of trays, which can add weeks or even months to your treatment time and potentially increase the overall cost. Consistently hitting that 20-22 hour target is the single most important factor in keeping your treatment on schedule and achieving the results you want, making effective hygiene logistics not just about comfort, but about the success of your entire orthodontic journey.
What to Do If You Lose Your Current Tray While on Vacation?
Losing an aligner is stressful enough at home, but when it happens while you’re on vacation, it can feel like a crisis. Did you leave it in a napkin at a restaurant? Did it fall out of your bag? The good news is that with a bit of foresight, this situation is entirely manageable and won’t derail your treatment. The ultimate hygiene hack here is a proactive prevention strategy: the “Travel Triangle.”
Never travel with just your current set of aligners. The Travel Triangle means you always pack three sets, stored in separate, labeled cases and in different bags to minimize the risk of losing everything at once:
- Your PREVIOUS set of aligners.
- Your CURRENT set of aligners.
- Your NEXT set of aligners.
This simple system gives you immediate options. If you lose your current tray, the action you take depends on your trip’s duration and where you are in your current tray’s cycle. Your first step should always be to contact your Montreal orthodontist via their patient portal or emergency contact number, which you should save in your phone before you even leave.
The following decision guide outlines the general approach, but always follow the specific instructions from your orthodontist.
| Trip Duration | Action if Tray Lost | Risk Level |
|---|---|---|
| 1-3 days | Use previous tray | Low |
| 4-7 days | Use previous tray + contact orthodontist | Medium |
| 8+ days | Switch to next tray with orthodontist approval | High – requires consultation |
Your Pre-Travel Aligner Checklist: The Travel Triangle Strategy
- Pack Three Sets: Always pack your current, previous, and next aligners in separate, labeled cases.
- Distribute and Secure: Store the different sets in different bags (e.g., one in your carry-on, one in your purse) to avoid losing all of them if a bag is lost.
- Save Emergency Contact: Program your Montreal orthodontist’s emergency contact number and patient portal login into your phone before you depart.
- Prepare a Draft Email: Have an email template ready with your Patient Name, Tray Number Lost, Travel Return Date, and Current Location to send for a quick response.
- Assess and Act: If you’re on a short weekend trip to the Laurentians and lose a tray, temporarily wearing your previous tray is a safe bet until you can call your clinic. For longer trips, immediate contact is crucial.
Why Is the First Day of a New Tray Always the Most Painful?
That familiar, deep ache during the first 24 to 48 hours of a new aligner set is a sign that your treatment is working, but that doesn’t make it any more pleasant. This discomfort stems from a biological process known as the “Peak Force” principle. Each new tray is designed to be slightly different from the current position of your teeth, and when you first snap it on, it exerts the maximum amount of corrective force for that two-week cycle. This pressure creates acute inflammation in the periodontal ligament (PDL), the soft tissue that surrounds your tooth roots and acts as a shock absorber.
This inflammation is what you feel as soreness, sensitivity, or a feeling of intense pressure. It’s a temporary response as your body begins the process of bone remodeling that allows your teeth to move. Managing this initial discomfort is crucial not just for comfort, but for compliance. If it hurts too much, you’re less likely to wear your trays for the required 22 hours.
Fortunately, there are several effective hacks to manage this peak force period:
- Time Your Switch: The best time to switch to a new tray is on a Friday evening or right before you go to bed. This allows you to sleep through the initial 6-8 hours of most intense pressure.
- Use Pain Relievers Wisely: An over-the-counter anti-inflammatory like ibuprofen, available at any Montreal pharmacy, can be very effective if taken about an hour before you switch trays.
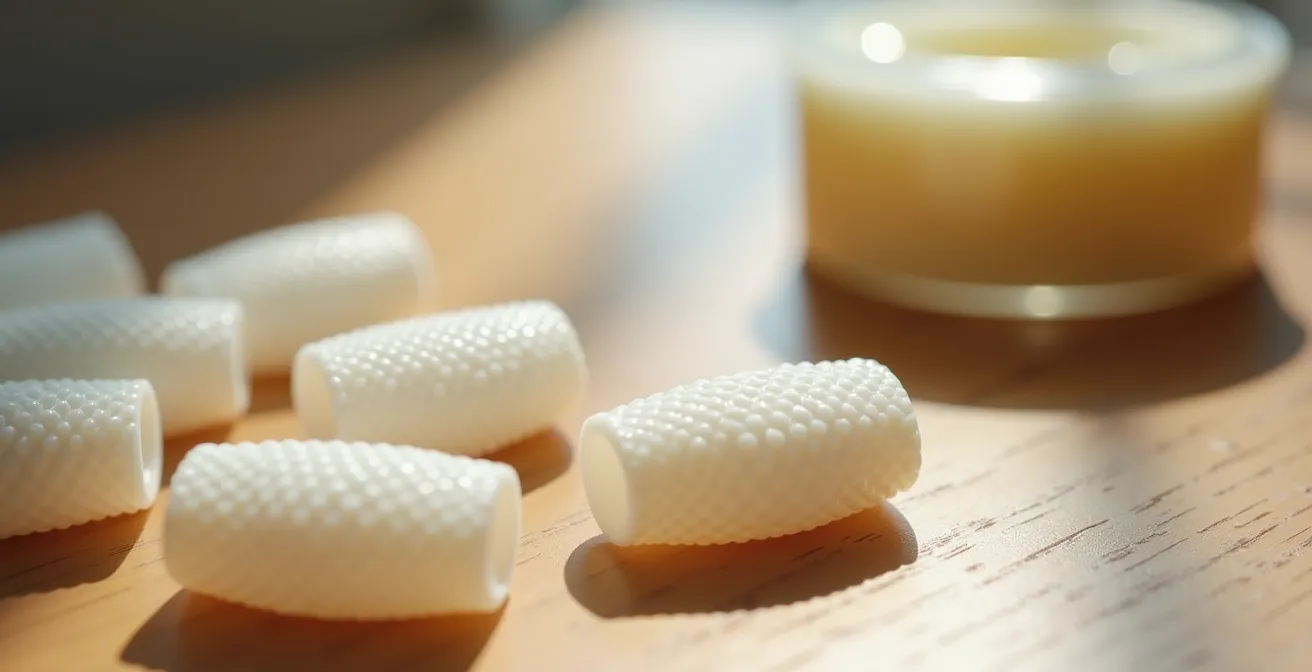
- Embrace Aligner “Chewies”: These small, soft silicone tubes are a game-changer. Biting down on them for a few minutes several times a day helps to fully seat the aligner, ensuring the forces are distributed evenly. More importantly, the chewing motion increases blood flow around the tooth roots, acting like a massage for the sore PDL and helping to dissipate the soreness much faster.
Using tools like chewies and timing your tray changes strategically can transform the first few days with a new aligner from a painful ordeal into a manageable part of the process, ensuring you stay on track with your treatment without unnecessary discomfort.
Why Is Your Breath Bad Even Though You Brush Twice a Day?
You’re diligent about brushing your teeth twice a day, yet you still notice that your breath isn’t as fresh as you’d like, especially when wearing aligners. This frustrating situation arises from a simple anatomical fact: your teeth are only part of the equation. In fact, dental hygienists emphasize that brushing alone only cleans about 25% of the surfaces in your mouth. The other 75%—your tongue, cheeks, and the roof of your mouth—are covered in bacteria that produce volatile sulfur compounds (VSCs), the primary culprits behind bad breath (halitosis).
Clear aligners can exacerbate this issue in two ways. First, they can trap existing bacteria against your teeth, creating a warm, moist, and low-oxygen environment where odor-causing bacteria thrive. Second, they can slightly reduce saliva flow. Saliva is your body’s natural mouthwash; it neutralizes acids and washes away food particles and bacteria. A drier mouth means bacteria can multiply more freely. This is why hydration is extra important for aligner wearers, especially in an office with drying AC or heating.
To truly tackle bad breath, you need a whole-mouth hygiene strategy. Here are some critical workplace hacks for the busy Montreal professional:
- Use a Tongue Scraper: This is the single most effective tool for removing the bacterial film on your tongue. Keep one at your desk for a quick clean after lunch. You can find them at any local drugstore.
- Chew Xylitol Gum: When you have your aligners out for a meal, chewing sugar-free gum containing xylitol helps stimulate saliva production and inhibit bacterial growth.
- Manage Dry Mouth: Products like Biotene dry mouth spray, available at Jean Coutu or Pharmaprix, can provide immediate relief and help restore a healthy oral environment.
- Rinse After Coffee: Montreal’s coffee culture is strong, but coffee is acidic and can fuel bad breath. Even a quick swish of water after your coffee break (with aligners out) can make a big difference.
By expanding your focus from just your teeth to your entire mouth, you can effectively combat bad breath and maintain confidence throughout your 12-hour workday and beyond.
Why Does Plaque Come Back 12 Hours After a Cleaning?
That frustrating, fuzzy feeling that returns to your teeth just hours after a thorough cleaning is the work of dental biofilm, more commonly known as plaque. It’s not that your cleaning was ineffective; it’s that you’re in a constant battle with a highly efficient biological system. In fact, research confirms that dental biofilm begins to reform within minutes and can become a mature, organized colony within 24 hours after being completely removed.
Your aligners create the perfect incubator for this process. The warm, moist space between the tray and your teeth, with limited saliva flow, is an ideal environment for bacteria to multiply. During a 12-hour workday, this biofilm has ample time to build up. Since a full brush-and-floss routine isn’t always feasible in an office setting, the strategy shifts from *elimination* to *disruption*. The goal is to continually disturb the biofilm so it can’t organize and mature into tartar or cause odors. This is where the concept of “hygiene triage” comes into play.
Hygiene triage means choosing the best possible action based on your current situation. It’s a tiered approach to workday oral care:
- Good: Vigorous Water Swishing. After a snack or coffee, vigorously swishing water in your mouth for 30 seconds helps dislodge food particles and disturb the newly forming, loosely attached biofilm. It’s the absolute minimum, but it’s far better than doing nothing.
- Better: Portable Water Flosser. Using a compact water flosser in the office restroom provides a much more powerful disruption, blasting away biofilm from between teeth and along the gumline. It’s a quick and highly effective intermediate step.
- Best: Quick Travel Kit Brushing. The gold standard for on-the-go care. A quick, one-minute brush with a travel toothbrush (even without toothpaste) is the most effective way to mechanically remove the biofilm before it can strengthen its foothold.
By practicing hygiene triage, you actively manage biofilm throughout the day. You’re not aiming for perfection; you’re aiming for consistent disruption, which is the most powerful tool you have to keep your teeth and aligners clean and fresh during a long day.
Key takeaways
- Stop using abrasive toothpaste on your aligners; switch to clear antibacterial soap or specialized foams to prevent micro-scratches and bacterial buildup.
- Adopt a “hygiene triage” mindset at work: a vigorous water rinse is good, a portable water flosser is better, and a quick brush is best for disrupting biofilm on the go.
- Prepare for the unexpected by always traveling with your previous, current, and next aligner sets—the “Travel Triangle”—to handle any emergencies without delaying your treatment.
Why Toothpaste Is Actually Ruining the Clarity of Your Aligners?
We’ve established that toothpaste is the enemy of aligner clarity, but it’s worth revisiting this rule to build a master cleaning protocol. Think of your aligners like high-performance gear: they require specific care to function optimally. Using the wrong tool—in this case, an abrasive toothpaste—doesn’t just cause a cosmetic issue; it fundamentally compromises the material integrity of the device responsible for moving your teeth.
The cumulative effect of daily micro-scratches creates a permanently clouded, rough surface. This not only makes your “invisible” aligners more visible but also makes them stickier to bacteria. A scratched aligner is a plaque magnet. This is the root cause of persistent odor and discoloration that even dedicated cleaning can’t seem to fix. By ditching toothpaste, you are moving from a reactive cleaning cycle (scrubbing away visible grime) to a proactive one (maintaining a smooth surface that naturally repels buildup).
Your ultimate on-the-go hygiene protocol synthesizes all the hacks we’ve discussed into a simple, effective routine. At home, you perform your deep clean using a soft brush and non-abrasive soap or foam. During your 12-hour workday, your mission is purely biofilm disruption. After your lunch or coffee, you execute your hygiene triage: swish with water, use a water flosser, or do a quick brush. This daily maintenance, combined with a proper cleaning agent at home, ensures your aligners remain truly invisible and odor-free. This master protocol is the key to closing the gap between the ideal world of orthodontic instruction and the real world of a busy professional.
This comprehensive approach protects your investment, ensures your comfort, and keeps your treatment discreet and on track. It transforms aligner care from a chore into a seamless part of your daily high-performance routine.
To put these advanced hygiene hacks into practice, the next logical step is to ensure you have the right tools. Evaluate your current aligner care kit and upgrade it with a discreet case, a travel-sized soft brush, and a non-abrasive cleanser for a truly effective on-the-go routine.