
The thought of a long, painful gum graft recovery can be overwhelming. However, the key to minimizing downtime and anxiety isn’t just about enduring the post-operative phase; it’s about mastering the preparation. By creating a proactive physical and mental “healing blueprint” before your surgery, you can take control of the process, transforming your recovery from a source of fear into a predictable and manageable journey back to health.
For many patients in Montreal, the recommendation for a gum graft brings a complex mix of relief and dread. Relief, because you finally have a solution for sensitive, exposed roots and the “long tooth” look that makes you self-conscious. But dread, because the stories about recovery—the pain, the diet, the downtime—can be truly intimidating. You’re not alone in feeling this anxiety; it’s a completely normal reaction to a surgical procedure in a very sensitive area.
The standard advice often feels generic: “eat soft foods,” “get some rest,” “take your medication.” While true, this advice only scratches the surface and does little to calm the nerves of a patient who is genuinely terrified of the healing process. It positions you as a passive recipient of a difficult experience. But what if the secret to a smoother, faster, and less stressful recovery lies not in what you do *after* the surgery, but in how you meticulously prepare *before* it? What if you could build a framework for healing that gives you a profound sense of control?
This is where our perspective shifts. We will move beyond the platitudes and provide you with a comprehensive healing blueprint. This guide is designed from a surgeon’s viewpoint, focused on empowering you with the knowledge to prepare your body and mind. We’ll explore the critical choices you can make beforehand, from the type of graft material to your pre-op nutrition, that will directly impact your comfort and recovery speed. This isn’t just about getting through it; it’s about leading your own healing with confidence.
In this detailed guide, we will walk through every stage of preparation and recovery, providing you with the clear, actionable information needed to face your gum graft surgery with a sense of calm and control. The following sections are designed to answer your most pressing questions and demystify the entire process.
Summary: A Patient’s Complete Guide to Gum Graft Preparation and Recovery
- Your Own Palate vs. Donor Tissue: Which Graft Source Is Less Painful?
- How Gum Grafts Fix the “Long Tooth” Look in Aging Smiles?
- What Foods Must You Avoid for 14 Days After a Gum Graft?
- White Patches vs. Necrosis: How to Tell If Your Graft Is Healing Properly?
- Why You Should Treat Recession Before It Reaches the Mucogingival Junction?
- Why Are Your Gums Receding Even Though You Brush Twice a Day?
- Prep vs. No-Prep Veneers: Which One Looks More Natural?
- What Foods Should You Eat to Accelerate Gum Graft Healing?
Your Own Palate vs. Donor Tissue: Which Graft Source Is Less Painful?
One of the most significant decisions you and your periodontist will make is choosing the source of your new gum tissue. This choice directly influences your post-operative experience, particularly the level of discomfort. The two main options are an autograft, using your own tissue (typically from the palate), and an allograft, using medically processed donor tissue. For a patient concerned about recovery, understanding this trade-off is the first step in your healing blueprint.
The traditional “gold standard” is the autograft. Its main advantage is that the tissue is your own, leading to an exceptionally high success rate. However, it requires a second surgical site on the roof of your mouth. This means you are essentially healing in two places at once, which logically leads to more discomfort. The palate can feel like you have a bad pizza burn for a week or two, making eating and speaking more challenging.
Conversely, using an allograft (donor tissue) eliminates the need for a palatal surgical site. The procedure is confined only to the area of recession. As many patients find, this option often results in a significantly more comfortable and faster recovery period. While there is an additional material cost for the donor tissue, which can range from $600 to $1200 per tooth in some Canadian clinics, many people in Montreal feel the investment is worthwhile to avoid the pain and inconvenience of healing a second site.
To make this decision clearer, it’s helpful to see a direct comparison. The following table, based on information from leading Canadian periodontists like Dr. Caudry in Toronto, breaks down the key differences:
| Aspect | Palate Graft (Autograft) | Donor Tissue (Allograft) |
|---|---|---|
| Material Cost | No additional material cost | $400-$800 CAD (Material only) |
| Surgical Sites | Two (palate + recipient) | One (recipient only) |
| Recovery Discomfort | Higher (due to two healing sites) | Lower (single site) |
| Success Rate | Gold standard – highest | Excellent, comparable to palate |
| Healing Time | Slightly longer overall | Potentially faster initial comfort |
Patient Preference: Choosing Comfort Over Cost
In our practice, we see many professionals, parents, and active individuals who simply cannot afford the extra downtime and discomfort associated with a palatal graft. A patient from Westmount recently opted for an allograft for this exact reason. Despite the added cost, she was back to her client-facing job with minimal discomfort within days, a scenario she felt would have been impossible with a palate graft. As noted by many clinics, this is a common choice because it eliminates the secondary surgical site in the mouth, leading to a much more manageable recovery.
How Gum Grafts Fix the “Long Tooth” Look in Aging Smiles?
Gum recession does more than just cause sensitivity; it can dramatically alter the aesthetics of your smile. As gums recede, more of the tooth root becomes exposed. This creates the illusion of “long teeth,” a common concern that many people associate with an aging or unhealthy appearance. A gum graft is not just a protective procedure; it is a cosmetic one that restores the natural, harmonious proportions of your smile.
The goal of the graft is to cover the exposed root surface with new, healthy tissue. By surgically placing this tissue, your periodontist effectively “moves the gumline back down” to a more youthful and aesthetically pleasing position. This intervention has a profound impact. As one leading group of downtown Montreal dentists explains, gum grafting can make the teeth look shorter, more symmetrical, and generally more pleasing to look at. It re-establishes the beautiful, scalloped frame that your gums are meant to provide for your teeth.
Furthermore, the procedure offers an opportunity for subtle re-contouring. An experienced surgeon can enhance the adjacent tissue, augmenting its thickness and shape for an even better cosmetic outcome. This ensures the final result looks completely natural and blends seamlessly with the rest of your gumline. The success of this cosmetic aspect is well-documented; studies on various grafting techniques consistently show significant improvements. For instance, research into the coronally repositioned flap technique has demonstrated average root coverage ranging from 63% to 86%, a result that translates directly into a visibly improved smile.
Ultimately, treating recession is an investment in both the health and the beauty of your smile. It reverses a key sign of dental aging, protecting the vulnerable root surface while restoring the confidence that comes from having a balanced, healthy-looking smile. This dual benefit is what makes gum grafting one of the most powerful procedures in periodontics.
What Foods Must You Avoid for 14 Days After a Gum Graft?
Your dietary choices in the two weeks following surgery are a cornerstone of your recovery. The wrong foods can physically dislodge the delicate graft, introduce bacteria, or cause irritation that delays healing. This part of your healing blueprint is non-negotiable and requires strict adherence. Think of it as protecting a very fragile, very important investment.
Immediately after surgery and for the first few days, your diet will be the most restrictive. The primary goal is to avoid any and all trauma to the surgical site. For the first 24-48 hours, you should stick to cool or cold liquids and very soft foods. This helps minimize swelling and bleeding. However, it’s crucial to avoid using straws. The suction created by a straw can dislodge the blood clot that is essential for healing, leading to a painful complication known as a dry socket.
As you progress, the key is to avoid foods that are hard, crunchy, crumbly, spicy, acidic, or served at a hot temperature. These foods pose a direct threat to the graft.
- Hard & Crunchy Foods: Items like chips, nuts, and popcorn can easily break into sharp pieces that can get lodged under the graft, causing infection or failure.
- Crumbly & Small Foods: Seeds, rice, and small grains can also become trapped in the surgical area, acting as foreign bodies that impede healing.
- Hot & Acidic Items: Hot soups, coffee, and acidic foods like citrus fruits or tomatoes can irritate the sensitive healing tissues and increase inflammation. Carbonated beverages should also be avoided.
This image showcases the types of gentle, nourishing foods that will become your best friends during recovery. They are easy to consume and provide the nutrients your body needs to heal without threatening the surgical site.

Adhering to this restricted diet is a powerful, proactive step you can take to ensure a successful outcome. It might feel limiting, but remember that this is a short-term sacrifice for a long-term gain: a healthy, stable gumline. Planning your meals and shopping ahead of time will make this period much easier to manage.
White Patches vs. Necrosis: How to Tell If Your Graft Is Healing Properly?
The first week after your surgery can be a time of uncertainty. You’ll be closely watching the surgical site, and it’s easy to mistake normal healing signs for a problem. This is where understanding the “tissue dialogue”—the signs your body is sending you—is crucial for your peace of mind. One of the most common sources of anxiety is seeing white patches on or around the graft. It’s vital to distinguish between a normal healing sign and a true warning sign.
It is almost guaranteed that you will see a whitish film develop over the surgical site. This is not pus or infection. As a prominent Montreal surgical center’s instructions clarify, this is a completely normal part of the healing process. As Dr. Stefanuto from Apex Surgical in the West Island states in his post-operative guidelines:
You may notice a white film over the surgical sites. This is completely normal.
– Dr. Stefanuto, Apex Surgical Post-Operative Instructions
This film is essentially a “scab” for the mouth, made of granulated tissue and proteins that protect the underlying area as new blood vessels form. It’s a positive sign that your body is building the foundation for your new gum tissue. This film will gradually slough off on its own as the vibrant, pink gum tissue forms underneath.
In stark contrast, graft failure or necrosis (tissue death) looks very different. A failing graft will often appear as a large, distinct white or yellowish patch that begins to detach from the tooth and surrounding gums. It won’t look like a thin film, but rather a piece of tissue that is clearly not integrating. This is often accompanied by other emergency signs, such as increasing pain after day three, a foul odor, or pus. Understanding the difference between discomfort (normal) and distress (a warning sign) is key. The following checklist will help you clearly identify what is normal and what requires an immediate call to your surgeon’s office.
Your Post-Graft Healing Checklist: Normal vs. Emergency Signs
- Observe the Color and Texture: Is it a thin, whitish film that is firmly attached (Normal Healing), or a thick, solid white/yellow patch that seems to be lifting away (Potential Emergency)?
- Monitor Swelling Progression: Is swelling mild and peaking around day 3 before starting to subside (Normal), or is it increasing significantly after day 3 (Emergency)?
- Check for Bleeding: Is there minimal oozing mixed with saliva for the first 24-48 hours (Normal), or is there active, persistent bleeding beyond 48 hours (Emergency)?
- Assess Your Temperature: Are you feeling generally well (Normal), or do you have a fever over 38.3°C / 101°F (Emergency)?
- Note Any Odor or Discharge: Is the site relatively clean (Normal), or is there visible pus or a persistent foul odor from the surgical site (Emergency)?
Why You Should Treat Recession Before It Reaches the Mucogingival Junction?
Your gums are composed of two distinct types of tissue, and the boundary between them is a critical landmark in periodontal health: the mucogingival junction (MGJ). Understanding this piece of anatomy is key to realizing why treating gum recession early is not just recommended—it’s essential for a more predictable and successful outcome.
The gum tissue that is firmly wrapped around your teeth is called attached gingiva. It’s tough, resilient, pink, and designed to withstand the friction of chewing and brushing. Further down, this tissue meets the alveolar mucosa, which is the darker red, looser, and more fragile tissue that forms the inside of your cheeks and lips. The visible line where these two tissues meet is the mucogingival junction. You can often see it in a mirror if you gently pull down your lower lip.
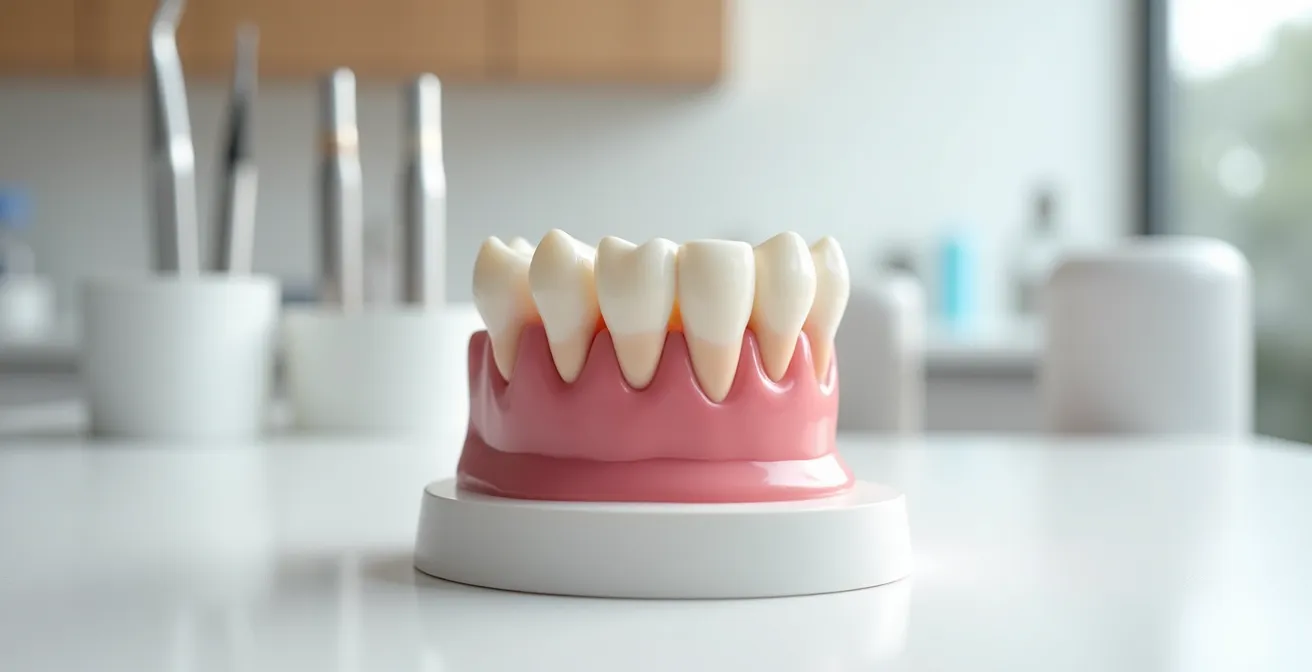
This diagram helps visualize the different zones of your gum tissue. The tough, pale pink attached gingiva is the protective barrier for your teeth, while the darker alveolar mucosa is much more delicate.
The problem arises when gum recession progresses to the point where the band of tough, attached gingiva is completely lost and the gumline recedes down to or past the mucogingival junction. When this happens, the fragile alveolar mucosa is now at the tooth’s edge. This tissue is not designed to be a protective collar. It is easily traumatized, highly prone to inflammation, and continues to recede much more rapidly. Grafting onto this mobile, delicate tissue is significantly more challenging for the surgeon, and the outcomes can be less predictable than when a healthy band of attached gingiva is still present.
Think of the attached gingiva as a strong retaining wall. Treating recession while that wall is still partially intact is like making a repair. Waiting until the wall has completely crumbled and the gumline is in the “danger zone” of the alveolar mucosa is a much larger and more complex reconstruction project. Acting early, while you still have a foundation of strong tissue to work with, is the most effective strategy for ensuring the long-term success and stability of your gum graft.
Why Are Your Gums Receding Even Though You Brush Twice a Day?
It’s one of the most frustrating paradoxes in dental health: you’re diligent about your oral hygiene, brushing twice a day, yet your dentist tells you your gums are receding. This can feel confusing and unfair, but it highlights a crucial fact—recession is often caused by factors that have little to do with being “unclean.” Understanding these hidden causes is the first step toward preventing further damage.
While poor hygiene and periodontal disease are common culprits, many other factors can contribute to gum loss. One of the most frequent causes is actually traumatic brushing. Using a hard-bristled brush or applying too much force can physically scrub away the delicate gum tissue over time, even if your teeth are perfectly clean. Another major factor, especially common in a high-pressure city like Montreal, is bruxism—the clenching or grinding of teeth. This immense pressure puts stress on the entire supporting structure of the teeth, which can accelerate gum recession.
Furthermore, your own anatomy plays a significant role. Some individuals are simply born with a “thin biotype,” meaning their gum tissue is naturally more delicate and susceptible to recession. As a dental clinic in Anjou points out, poorly positioned tissue or muscle attachments can also pull on the gum margin, causing it to recede. The causes are multi-faceted and often a combination of factors. A comprehensive review published in a leading medical journal highlights several hidden causes that patients should be aware of:
- Genetic Factors: Inheriting a ‘thin biotype’ makes gums more fragile and prone to recession from even minor trauma.
- Bruxism: The immense force from teeth grinding, often linked to stress, can damage the ligaments and bone supporting the teeth, leading to recession.
- Orthodontic Relapse: If teeth shift slightly years after braces, it can create a traumatic bite (malocclusion) where certain teeth hit harder, causing localized recession.
- Lip or Tongue Piercings: The constant mechanical friction from a piercing stud or ring is a direct cause of traumatic recession.
- Improper Flossing Technique: Snapping floss down onto the gums instead of gently contouring it to the C-shape of the tooth can cause repeated injury and notching of the gum tissue.
–
Recognizing these other potential causes is empowering. It shifts the focus from self-blame to proactive problem-solving. A gum graft can repair the existing damage, but identifying and addressing the underlying cause—whether it’s switching to an ultra-soft toothbrush, getting a nightguard for grinding, or adjusting your flossing technique—is the key to preventing recession from recurring in the future.
Key Takeaways
- Proactive preparation—mental, physical, and nutritional—is the most powerful tool for minimizing gum graft recovery time and anxiety.
- Choosing donor tissue (allograft) often leads to a significantly more comfortable recovery by eliminating the second surgical site on the palate.
- Understanding the difference between normal healing signs (like a white film) and emergency signs (like a detaching graft) is crucial for your peace of mind.
Prep vs. No-Prep Veneers: Which One Looks More Natural?
After successfully restoring the health and foundation of your gums with a graft, you may start thinking about the next steps in perfecting your smile’s appearance. This is where other cosmetic procedures, like porcelain veneers, can come into play. It’s useful to understand the philosophy of preparation in these treatments, as it draws a fascinating parallel to the choices you make in gum grafting.
Veneers are thin shells of ceramic bonded to the front of teeth to change their color, shape, size, or length. The central question in veneer treatment is often “prep” versus “no-prep.” “Prep” veneers involve the strategic, minimal removal of a thin layer of tooth enamel (usually 0.3mm to 0.5mm). This preparation creates the physical space for the porcelain, allowing the dental technician to craft a veneer that has ideal contours and a seamless, natural transition at the gumline. This approach offers the highest level of control for achieving a perfect aesthetic outcome.
“No-prep” or “minimal-prep” veneers, on the other hand, are placed directly onto the unprepared tooth surface. While the idea of preserving all of your natural enamel is appealing, this approach has limitations. Because no space is created, the final result can sometimes look slightly bulky or less natural, especially at the gumline. It’s best suited for specific cases, such as closing small gaps or adding volume to small teeth.
The choice is a trade-off, much like the palate vs. donor tissue decision in grafting. “Prep” veneers require a greater initial commitment (enamel removal) for a potentially more ideal and controlled final result. “No-prep” is less invasive but offers less artistic control. The most natural look is almost always achieved when the technician has adequate space to work with, which typically involves some level of preparation. This highlights a universal principle in dentistry: thoughtful preparation is often the key to the most beautiful and lasting results.
What Foods Should You Eat to Accelerate Gum Graft Healing?
While knowing what to avoid is critical, focusing on what you *should* eat is an equally powerful strategy for a smooth recovery. Building a “nutritional scaffolding” for your healing tissues can help reduce inflammation, support cell regeneration, and accelerate your return to comfort. This is the proactive side of your post-operative diet—actively giving your body the building blocks it needs to repair itself efficiently.
In the first few days, your focus will be on cool, soft, and nutrient-dense foods. Think beyond simple ice cream and pudding. These foods should be both gentle on the surgical site and packed with healing potential.
- Protein-Rich Smoothies: Blend a high-quality protein powder with Greek yogurt, soft fruits (like banana or avocado), and spinach. Protein is essential for tissue repair, but remember: no straws! Drink it from a glass.
- Greek Yogurt and Kefir: These are excellent sources of protein and probiotics, which support your overall immune health as your body focuses on healing.
- Bone Broth: Served cool or at room temperature, bone broth is rich in collagen, amino acids, and minerals that are the direct building blocks for new gum tissue.
–
After the first few days, you can start to introduce soft, warm (not hot) foods. The goal is to continue providing high-quality nutrition without requiring any strenuous chewing. Scrambled eggs, soft-cooked fish like salmon (rich in anti-inflammatory Omega-3s), mashed potatoes or sweet potatoes, and creamy soups are all excellent choices. It is also absolutely vital to stay hydrated. Drinking plenty of water helps flush toxins from your system and is fundamental to every cellular process, including healing.
By thoughtfully planning your menu, you transform eating from a source of anxiety into an active part of your recovery. You are not just avoiding harm; you are actively promoting healing. Creating a shopping list and preparing some of these foods before your surgery day is one of the best things you can do to set yourself up for a comfortable and successful recovery.
Your journey to a healthier smile begins with this crucial preparation. By building your personalized healing blueprint, you can face your gum graft procedure not with fear, but with the confidence that you have done everything in your power to ensure a smooth, manageable, and successful recovery. To put these strategies into action, the next logical step is to have an open conversation with your periodontist here in Montreal to customize this plan for your specific needs.