Contrary to popular belief, persistent cavities between your teeth are not a sign of poor hygiene, but a spatial mapping failure.
- Standard brushing and simple flossing are ineffective against the unique ‘oral topography’ of gaps and contours where destructive plaque biofilm thrives.
- The solution lies in precise, instrument-based cleaning that matches the right size tool to each specific interdental space.
Recommendation: Think like a surveyor, not just a cleaner. Use an interdental sizing guide to map your mouth’s ‘blind spots’ and equip yourself with the correct tools to manage them effectively.
You brush diligently twice a day. You might even floss. Yet, at every dental check-up in Montreal, your dentist points out the same “watch spots” on your bitewing X-rays—those tiny shadows lurking between your teeth. It’s a common frustration that leads many to question their own efforts. The standard advice to “brush and floss more” feels inadequate, even dismissive, when you’re already doing your best. This cycle of effort and recurring issues suggests the problem isn’t a lack of trying, but a flaw in the fundamental approach.
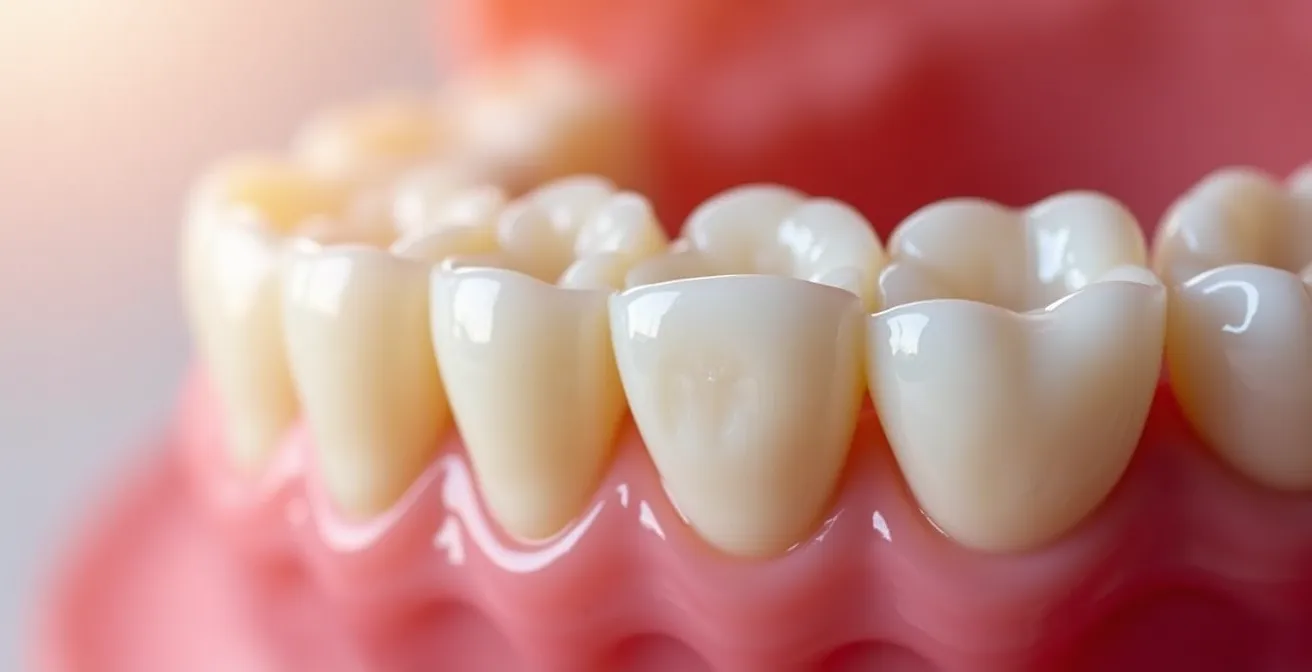
The common understanding of oral hygiene focuses on removing food debris. But what if the real challenge is not about cleanliness in the general sense, but about spatial awareness? What if your mouth is a complex landscape, an oral topography filled with hidden valleys, tight crevices, and blind spots that a toothbrush and a simple piece of floss can’t possibly navigate? The vast majority of adult cavities develop in these interproximal spaces, not because of neglect, but because they are architectural traps for bacterial biofilm.
This guide reframes the issue. We will move beyond the generic advice and adopt the mindset of a spatial analyst. The true key to preventing interproximal cavities isn’t just more effort; it’s more precision. It’s about understanding the unique geography of your own mouth and deploying the correctly sized tools to manage these unseen areas. We will explore why these gaps are so vulnerable, how to choose the right instruments, and why seeing your dental landscape on a screen can fundamentally change your approach to oral health for good.
This article provides a detailed analysis of the hidden spaces in your mouth where cavities thrive. We will dissect the problem from a new perspective, offering practical, targeted solutions to finally gain control over those frustrating “watch spots”.
Summary: Uncovering the Hidden Zones Where Cavities Begin
- Can You Close the Gaps Between Teeth Without Veneers?
- Why Does Meat Always Get Stuck in the Same Spot Between Your Molars?
- How to Choose the Right Size Brush for Your Gaps?
- Why “Snapping” the Floss Hurts Your Gums but Misses the Plaque?
- Why Does Your Tooth Look Fine but the X-Ray Shows a Huge Hole?
- Why Seeing Your Tooth on a Screen Changes How You Treat It?
- Why Do You Keep Getting Cavities Despite Brushing and Flossing?
- How to Choose the Right Size Brush for Your Gaps?
Can You Close the Gaps Between Teeth Without Veneers?
For many, the small gaps between teeth feel like a design flaw—spaces that cosmetic solutions like veneers could fix. However, from a spatial analyst’s perspective, these gaps aren’t the problem; the inability to effectively clean them is. The goal should not be to eliminate the space, but to master it. Trying to close natural, healthy gaps can sometimes create even more complex cleaning challenges. The focus must shift from cosmetic alteration to topographical management. The reality is that almost everyone faces this challenge; 96% of Canadian adults have dealt with at least one cavity, with a vast number of these originating in these exact interdental zones.
Managing these gaps involves a strategic, tool-based approach rather than an anatomical one. It requires recognizing that each space has a unique width and contour. A one-size-fits-all solution like a single strand of floss is often insufficient for the varied landscape of a mouth, especially around the molars where gaps can be wider and more complex. The solution is to arm yourself with a set of instruments designed for this varied terrain. Interdental brushes, which come in a range of calibrated sizes, are the surveyor’s essential tools for this task.
Instead of thinking about expensive cosmetic procedures, consider a targeted hygiene investment. A small pack of multi-sized interdental brushes provides a far more practical and effective solution for preventing decay in these vulnerable blind spots. Mastering the daily management of these spaces is the most powerful, non-invasive way to “close” them off to disease.
Your Action Plan: Mastering Interdental Gaps in Montreal
- Start Small and Size Up: Begin with the smallest interdental brush size (e.g., pink or orange TePe). Gently test it in a gap; if it feels loose, move up one size until the bristles make light contact with both tooth surfaces.
- Source Your Tools Locally: Visit major Montreal pharmacies like Jean Coutu or Pharmaprix. Look for starter packs from brands like TePe or GUM, which contain a variety of sizes to help you map your entire mouth.
- Master the Motion: Once you find the right size for a gap, insert the brush and move it to its full length back and forth 2-3 times. Do not force it.
- Customize Your Kit: Recognize that your oral topography is not uniform. Your front teeth will likely require smaller brushes than the wider spaces between your molars. You may need 2-3 different sizes for a complete cleaning.
- Integrate into Your Routine: Clean all of your interdental spaces once per day. The most effective time is in the evening, after your final meal, to remove the biofilm that has accumulated throughout the day.
Why Does Meat Always Get Stuck in the Same Spot Between Your Molars?
That frustrating experience of a piece of Montreal smoked meat or a steak fibre getting wedged in the exact same spot between your molars is not a random occurrence. It’s a clear signal of a specific topographical issue in your mouth’s landscape. This phenomenon is often caused by what dentists call a “plunger cusp.” This occurs when a pointed cusp of an upper tooth fits perfectly into the space between two lower teeth, acting like a piston. During chewing, it forcefully drives fibrous foods down into the interdental gap, wedging them tightly against the gums.
Another common cause is an “open contact.” This refers to a tiny gap between two adjacent teeth that should ideally be touching snugly. An open contact can be natural, or it can be inadvertently created by a dental filling or crown that wasn’t shaped perfectly to meet its neighbor. This creates a chronic food trap. The area becomes a high-risk blind spot because the impacted food provides a constant source of nutrients for cavity-causing bacteria, leading to rapid plaque formation, gum inflammation, and eventually decay.
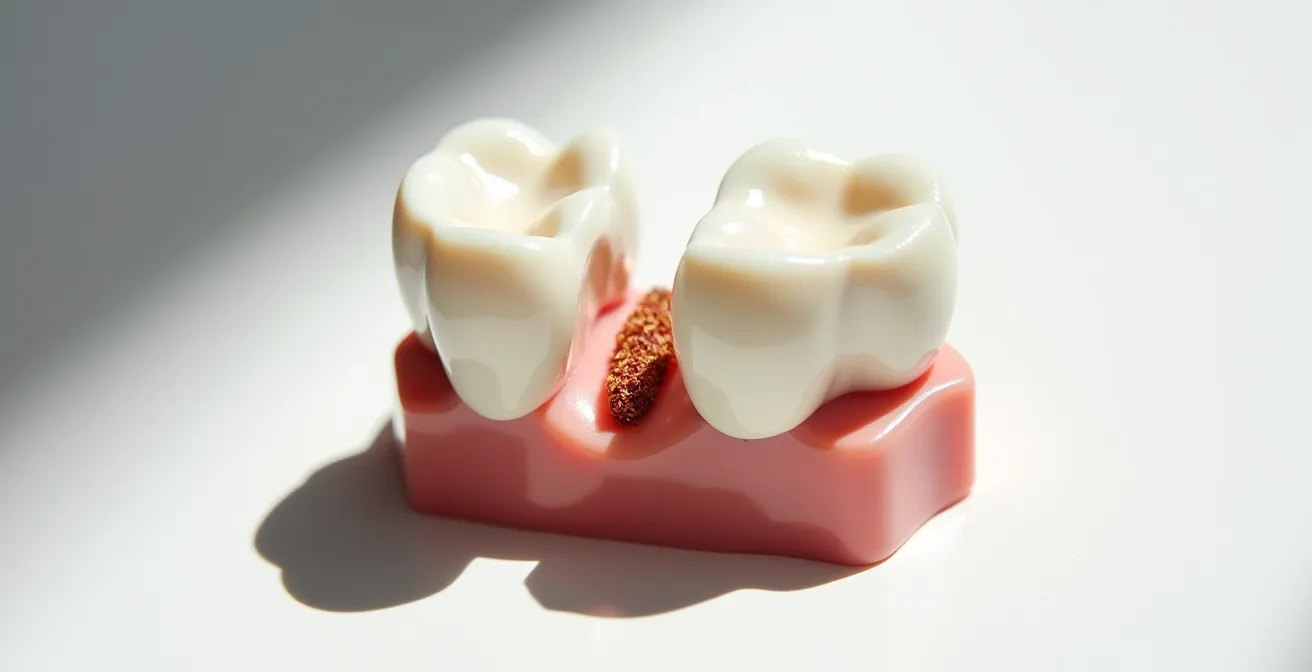
This recurring food impaction is a significant red flag. It indicates a structural vulnerability in your oral geography that standard brushing and even casual flossing will fail to resolve. Addressing it requires both mechanical cleaning with precision tools and a consultation with your dentist to see if a structural fix is needed.
Case Study: The Perpetual Food Trap
According to dental practitioners, improperly shaped fillings are a primary cause of chronic food impaction. When a dentist places a filling, recreating the original tight “contact point” with the next tooth is crucial. If this contact is left slightly open or is not broad enough, a gap is formed. This creates what is known as a chronic food trap. Fibrous foods like meat and certain vegetables are forcefully wedged into this space by the opposing tooth during chewing. This constant pressure and trapped debris significantly increase the risk of recurrent decay and gum disease in that specific location, a problem that can only be permanently solved by a dentist adjusting or replacing the faulty restoration.
How to Choose the Right Size Brush for Your Gaps?
Approaching interdental cleaning without the right size tool is like trying to sweep a large room with a tiny dust brush—inefficient and ineffective. The effectiveness of an interdental brush is entirely dependent on its fit. The goal is for the bristles to gently fill the space and make contact with the curved surfaces of both adjacent teeth, physically scrubbing away the sticky biofilm. A brush that is too small will pass through the gap without touching anything, doing virtually no cleaning. A brush that is too large will not fit, or will cause pain and damage to the gums if forced.
This is where thinking like a surveyor becomes essential. You must map the different “gap widths” in your mouth. The spaces between your narrow front teeth are very different from the spaces between your broad, blocky molars. It is perfectly normal, and in fact necessary, to use 2, 3, or even 4 different brush sizes to properly clean your entire mouth. For many people, floss may still be the best tool for extremely tight front teeth, while a progression of larger interdental brushes is needed for the back teeth.
To standardize this process, interdental brushes are color-coded according to the ISO (International Organization for Standardization) system. This allows you to identify the precise diameter of the wire and brush, ensuring you can consistently use and repurchase the correct sizes for your unique oral topography. Finding your specific set of sizes is a one-time process of careful trial and error, starting with the smallest size and working your way up for each gap.
The following table provides a guide to the common ISO sizes available from brands found in most Montreal drugstores. It serves as a starting map for your own exploration.
| ISO Size | Color Code (TePe) | Gap Width (mm) | Best For |
|---|---|---|---|
| ISO 0 | Pink | 0.4 mm | Very tight front teeth |
| ISO 1 | Orange | 0.45 mm | Tight front teeth |
| ISO 2 | Red | 0.5 mm | Normal front teeth |
| ISO 3 | Blue | 0.6 mm | Wider front teeth/tight molars |
| ISO 4 | Yellow | 0.7 mm | Normal molars |
| ISO 5 | Green | 0.8 mm | Wider molars |
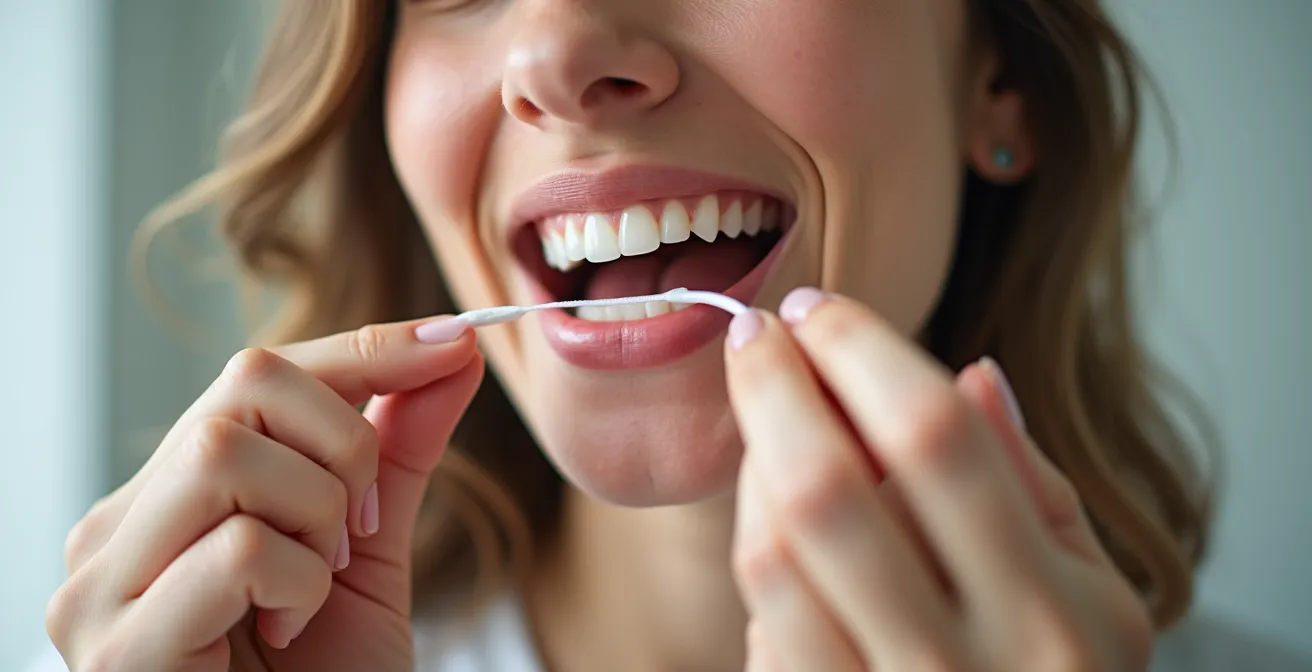
Why “Snapping” the Floss Hurts Your Gums but Misses the Plaque?
Many people who floss do so with a quick, forceful “snapping” motion, pushing the floss down past the tight contact point between teeth. While this may dislodge a large piece of food, it is an incredibly ineffective and often harmful way to remove the actual cause of cavities: the sticky, invisible bacterial biofilm known as plaque. Snapping the floss causes it to slice through the gum tissue, leading to bleeding and recession over time. More importantly, from a spatial perspective, this straight up-and-down motion completely misses the target.
The surfaces where interproximal cavities form are not flat; they are curved. They are the rounded sides of the tooth, hidden below the contact point. The “snapping” motion only cleans a very narrow line, leaving the vast majority of the bacterial colony undisturbed. To clean this curved surface effectively, you must change your technique from a “sawing” or “snapping” motion to a “wiping” or “scraping” one. This is known as the ‘C-Shape’ technique. After gently guiding the floss through the contact point, you must wrap it firmly around one of the teeth, forming the shape of the letter ‘C’. Then, you wipe the tooth surface from just below the gumline up towards the chewing surface, physically scraping the biofilm off.
This distinction in technique is not minor; it is the difference between performing a function and achieving a result. As one expert aptly describes it, the two methods have completely different mechanical effects on the plaque biofilm.
The correct ‘C-shape’ technique acts like a squeegee, scraping the entire bacterial colony off the tooth surface, while snapping is like a knife cutting through it, leaving most of it behind.
– Clay & Associates DDS, Cavity Between Teeth Prevention Guide
Why Does Your Tooth Look Fine but the X-Ray Shows a Huge Hole?
One of the most unsettling experiences at the dentist is being told you have a large cavity in a tooth that looks and feels perfectly fine. This is the classic scenario for an interproximal cavity and is best explained by the “iceberg effect.” A cavity between the teeth starts with a microscopic entry point on the hard, outer enamel surface. This initial breach is often too small to see with the naked eye and may cause no symptoms like sensitivity or pain. However, once the decay penetrates the enamel, it reaches the much softer layer underneath, called dentin.
Dentin is about seven times softer than enamel. Once inside this layer, the decay spreads rapidly, like a fire in dry brush, hollowing out the tooth from the inside. The strong outer enamel shell remains largely intact, masking the extensive damage occurring within. This is why you see nothing in the mirror, but a bitewing X-ray—which can see through the enamel—reveals a significant “hole” in the tooth’s internal structure. This is also why these cavities cannot heal on their own; once the physical structure is compromised, professional intervention is the only way to stop the progression and restore the tooth.
Detecting these “iceberg” cavities early is critical, not just for the health of the tooth, but for your wallet. A small, early-stage cavity discovered on an X-ray can be treated with a simple filling. If left undetected until it grows large enough to cause pain or for the enamel to collapse, the treatment becomes a much more complex and expensive root canal and crown. In this context, routine bitewing X-rays, the standard of care in Canada, are not an optional extra; they are the only reliable surveying tool for charting these hidden, destructive processes. The cost difference is stark, as Quebec government health resources confirm that early treatment is vastly more affordable than waiting for the problem to become a painful emergency.
Why Seeing Your Tooth on a Screen Changes How You Treat It?
For most people, a dentist’s warning about a “watch spot” is an abstract concept. It’s a professional opinion about an area you cannot see or feel. This abstraction is a major barrier to changing behavior. However, the dynamic changes completely when your dentist uses an intraoral camera to show you that exact spot, magnified on a large screen. Suddenly, the abstract warning becomes a tangible, personal reality. The “small area of decalcification” is no longer a clinical term; it’s a visible white line on *your* tooth. The “plaque buildup” is no longer a vague threat; it’s a visible film in a crevice you now recognize.
This shift from auditory information to visual evidence is a powerful psychological trigger. It moves the patient from being a passive recipient of advice to an active participant in their own health. When you can see the precise topography of the problem area, the instructions to “use the yellow brush in that back gap” or “wrap the floss around that tilted molar” suddenly make perfect sense. You have a visual map to follow. This process, often called co-diagnosis, transforms the patient’s role and dramatically improves their commitment to the prescribed home-care routine.
This visual feedback loop is the ultimate tool for the oral-spatial analyst. It allows you to connect the physical tools in your hand to the specific geographical locations in your mouth that require them. Don’t be a passive patient; ask your dental team to be your guide. Ask them to show you your X-rays and intraoral photos, pointing out the exact blind spots that require your attention. Taking a picture of the screen with your phone can even serve as a powerful daily reminder.
Montreal dental clinics report that patients who see their cavities on intraoral cameras during appointments become active participants in their treatment plans. The visual evidence transforms abstract warnings into tangible, personal problems that motivate immediate behavior change and improved oral hygiene compliance.
– Downtown Montreal Dentistry, Five Facts About Dental Cavities
Why Do You Keep Getting Cavities Despite Brushing and Flossing?
If you brush and floss diligently yet still face new cavities at your check-ups, you are confronting the central paradox of modern oral hygiene: effort does not equal effectiveness. The answer usually lies in one of three areas: a problem with technique, a problem with tools, or an underlying topographical or systemic issue. As we’ve seen, “snapping” floss is a technique failure. Using a brush that’s too small for the gap is a tool failure. These are the most common culprits.
However, sometimes the oral landscape itself presents a nearly impossible challenge. Severely crowded teeth, unusually shaped molars, or slight misalignments can create “plaque traps” that are virtually inaccessible, even with perfect technique and a variety of tools. In these specific cases, the solution may lie in orthodontics to correct the alignment or in asking your dentist about specialized cleaning aids. Furthermore, systemic factors like diet (frequent sugar intake), dry mouth (which reduces saliva’s protective effects), or inconsistent access to professional care can undermine the best home-care efforts.
This last point is a significant factor in Canada. The cost of dental care can be a major barrier, preventing people from getting the regular cleanings and check-ups that are essential for managing these problem areas. Data shows that this isn’t a minor issue; Statistics Canada data reveals that 25.9% of Canadian adults avoided dental visits due to cost in 2022, with that number jumping to a staggering 47.4% for those without dental insurance. When professional oversight is delayed, small, manageable blind spots can escalate into major problems, creating a cycle of decay that home care alone cannot break.
Finally, your individual risk profile matters. If you have a history of numerous cavities, your dentist may recommend a prescription-strength fluoride toothpaste (like PreviDent 5000, available in Montreal pharmacies) to help remineralize enamel and make your teeth more resistant to acid attacks. It’s a chemical reinforcement for your mechanical cleaning efforts.
Key Takeaways
- Cavities forming between teeth are primarily a ‘spatial’ problem related to oral topography, not just a simple failure of hygiene.
- Tool precision is more important than effort. The effectiveness of cleaning depends on matching the size of the interdental brush to the width of each specific gap.
- Bitewing X-rays are non-negotiable surveillance tools for detecting these hidden ‘iceberg’ cavities before they become large, painful, and expensive problems.
How to Choose the Right Size Brush for Your Gaps?
We have established the practical steps for selecting an interdental brush, but mastering this choice requires a fundamental shift in mindset. It’s about moving from the passive act of “cleaning” to the active process of “managing space.” This final section is not about re-reading a sizing chart; it’s about internalizing the philosophy of a spatial analyst. Your goal is to develop an intimate knowledge of your own oral topography—to know, by feel and by sight, that the space between your lower molars requires the ‘yellow’ brush, while the tight contacts of your front teeth require the ‘pink’ one.
This mastery transforms a daily chore into a targeted, effective health intervention. You are no longer just “flossing” or “brushing between your teeth”; you are performing a precise, daily survey of your mouth’s most vulnerable blind spots. This approach removes the guesswork and frustration. When you use the right tool for the job, you can feel the difference. The bristles engage the tooth surfaces, the biofilm is physically removed, and the result is a level of clean that a simple piece of floss can rarely achieve in wider gaps.
Embracing this precision-based approach is empowering. It gives you direct control over the 90% of adult cavities that frustrate so many. You are no longer at the mercy of your mouth’s tricky architecture. Instead, you become its skilled navigator, equipped with the right map (your knowledge of your gaps) and the right tools (your set of sized brushes) to keep it healthy for the long term. This is the ultimate answer to the question of why you keep getting cavities despite your best efforts.
The next logical step is to map your own dental topography. Take this knowledge to your next dental visit in Montreal and ask for a guided tour of your ‘blind spots.’ Work with your hygienist to confirm your interdental brush sizes and turn this new perspective into a lifelong habit.
Frequently Asked Questions About Why Do 90% of Adult Cavities Start Between the Teeth?
Why do I get cavities even though I brush twice daily?
Brushing alone cannot reach the interdental spaces where the vast majority of adult cavities form. The bristles of a toothbrush simply cannot clean the curved surfaces between teeth. You need specialized tools like interdental brushes or to use a proper ‘C-shape’ flossing technique to effectively disrupt the plaque biofilm in these hidden areas.
Does water fluoridation in Montreal help prevent cavities?
The status of water fluoridation can vary across different boroughs of Montreal. While fluoride is a powerful tool for strengthening enamel, its presence in tap water may not be consistent where you live. If you are at a high risk for cavities, it’s crucial to ask your dentist if a prescription-strength fluoride toothpaste, such as PreviDent 5000, would be a beneficial addition to your routine.
Can tooth anatomy make me more cavity-prone?
Yes, absolutely. Your individual oral topography plays a huge role. Factors like crowded or overlapping teeth, the specific shape of your molars (e.g., deep grooves or plunger cusps), or slight misalignments create natural ‘plaque traps.’ These areas are structurally difficult or nearly impossible to clean with standard methods, often requiring specialized tools, professional guidance, or even orthodontic solutions to reduce your risk.